Windows 10 has always offered multiple methods for attempting OS recovery. But with the release of Windows 10 version 2004 on May 27, 2020, one of those recovery methods disappeared from its previous home in Settings > Update & Security > Recovery.
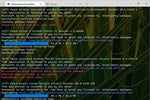
In Windows 10 versions 2004 and 20H2, you will no longer see the “More recovery options” item with subsidiary text that reads “Learn how to start fresh with a clean installation of Windows” in version 1909. Here’s a screen capture from 1909 that shows this information (boxed in red, at bottom of image):
 IDG
IDG
This option no longer appears in Windows 10 2004 or 20H2 and will not appear in later Windows 10 versions.
Where to find the “fresh start” functionality in 2004 and later
As it happens, Microsoft has removed this item to simplify Windows 10’s recovery options. Now the same functionality can be found in the main Reset this PC interface, as outlined in this Microsoft support note:
Fresh start is available for Windows 10 versions prior to 2004. For version 2004 and after, Fresh start functionality has been moved to Reset this PC. To reset your PC, go to Start Menu > Settings > Update & Security > Recovery > Reset this PC > Get Started. Then select Keep my files, choose cloud or local, change your settings, and set Restore preinstalled apps? to No.
If you don't see the option to Restore preinstalled apps, it means your PC doesn't have preinstalled apps configured and won't restore apps from your PC manufacturer.
Thus, Microsoft asserts — and FWIW, I agree — that the old “fresh start” option is the same as “Reset this PC” in version 2004 and 20H2 with the added selection of “Remove everything,” to wit:
 IDG
IDG
Choose the lower box (“Remove everything”) and you’re off to a “fresh start.”
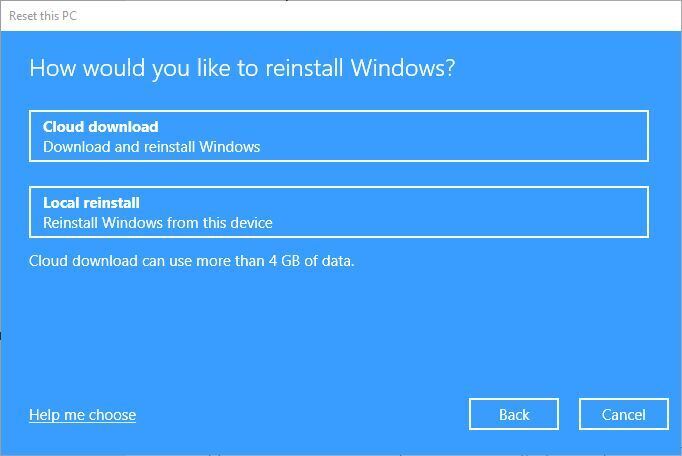
Note that on builds of Windows 10 2004 up to and including Build 19041.388, things didn’t work the way they should have. If you clicked either “Keep my files” or “Remove everything” in the first step of the Reset this PC option sequence, you saw an error message instead of continuing down the reset path.
Starting with Build 19041.450 for 2004 and with all 20H2 builds, however, users should see the following screen, which lets them choose between a cloud download and a local reinstall:
 IDG
IDG
For most people, downloading fresh Windows files from the cloud is a better option than reinstalling from local files.
The “Cloud download” option grabs fresh, new files from Microsoft servers, from which the reinstall proceeds. This is recommended, because problems with local files may affect the local recovery partition or folder that a reset is supposed to address. That said, “Local reinstall,” which grabs files from the local Windows Recovery Environment (WinRE), may make sense for those with slow or expensive internet connections.
Interestingly, in early October Microsoft published a support note that documents further issues with “Reset this PC.” It explains that in 20H2 and 2004, “certain hardware configurations” may get a “There was a problem…” error message when attempting this maneuver. If so, they should run DISM /online /cleanup-image /restorehealth in an administrative command prompt or PowerShell session. (To start an administrative command prompt, type cmd in the Windows search box, right-click Command Prompt from the list of results, select Run as administrator, and enter the password if prompted.)
After a reboot, try the “Reset this PC” path again; for most PCs, it should work.
Still not working? Alternate clean install methods to the rescue
Most experienced Windows admins call what Reset this PC does a “clean install” of Windows 10 — namely, one where the system/boot drive is wiped clean, a new partition layout constructed en route to Windows 10 installation, and a clean, fresh copy of the OS laid down. Perforce this means all third-party and added applications, user settings and preferences, and user files will be absent. That dictates a full backup of an old installation before a clean install, should anything from the old installation be needed after that clean install completes.
The basic technique for performing a clean install is to boot the target PC using bootable media (usually a USB flash drive, or UFD) that includes the desired Windows 10 installation files. After booting to that UFD, admins simply work through the installer prompts and eventually wind up with a fresh, clean install of Windows 10. There are many ways to get there from here, but I describe two favorites.
Method 1: Visit Download Windows 10, use the MCT
On Microsoft’s Download Windows 10 page, you can download and run its Media Creation Tool (MCT). As you work through its options, you’ll do the following:
- Accept the Microsoft Software License Terms.
- Select the radio button next to “Create installation media…”
- Select the language, edition and architecture desired — that’s “English (United States),” “Windows 10,” and “64-bit (x64)” in my case (and that of many readers, I’d guess).
- You can instruct the MCT to create a bootable UFD for you by clicking the radio button next to “USB flash drive,” or you can save an ISO file (my usual preference, because of Method 2) to write a Windows 10 installation ISO file to disk. Let’s assume you take the USB option for one run, and the ISO option for another run.
Using the bootable UFD you created with the MCT, insert it in the target PC, and reboot it into that UFD for its next start. Savvy admins will do this in the BIOS after the PC restarts before Windows gets going.
Once you’ve booted into the UFD, the Windows 10 installer will load and run automatically to guide you through a clean install. Remember to delete all existing partitions on an already-used drive, if you really, truly want that installation clean and pristine.
Method 2: Visit Download Windows 10, use Ventoy
Ventoy is a GitHub project that offers an amazing capability: it creates a tiny 32MB EFI boot partition and allocates the rest of the USB medium to an exFAT partition. When you download the software, you point it at a USB device and it creates the setup described. Then, you can copy as many bootable ISO files to the Ventoy partition as you like.
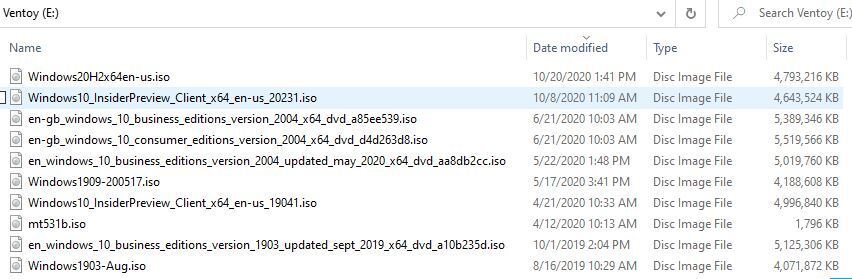
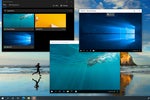
When you boot to the USB device, Ventoy shows you a menu of all the ISO files it sees on its eponymous partition. You can choose any one of them to boot into it. (Ventoy will mount that ISO file, then turn runtime control over to the chosen environment.) I’ve gotten in the habit of keeping numerous ISO images in Ventoy, including multiple Windows 10 versions and the Microsoft Diagnostics and Recovery Toolset (a.k.a. DaRT). This screencap shows numerous recent Win10 versions:
 IDG
IDG
Windows 10 versions 1903 through 20H2 and some Insider Previews, all on one UFD. (Click image to enlarge it.)
Ventoy has the advantage of being able to accommodate ISOs of arbitrary size, so that admins need not be constrained by the 4GB limit imposed for FAT32 formats. You can even use the DISM command to capture a Windows image file (.WIM) for a canonical or customized Windows 10 installation, then convert it to an ISO file (as explained in this excellent TenForums.com tutorial: How to create a Windows 10 ISO image for clean, in-place upgrade and repair install).
Reset this PC (usually) does the job
For those using older Windows 10 versions 1903 and older, Build 19041.450 or newer for 2004, or any 20H2 version, Reset this PC works almost entirely as advertised. If you see a “There was a problem…” error as reported in Microsoft’s support note, the DISM workaround will set most PCs back to working condition. If you encounter any further difficulties, alternate Methods 1 and 2 should do the trick.
This article was originally published in July 2020 and updated in November 2020.


![laptop keyboard with a life preserver or personal floatation device [PFD]](https://images.idgesg.net/images/article/2018/02/rescue_diagnose_fix_patch_update_laptop_thinkstock_185931513-100749650-small.3x2.jpg?auto=webp&quality=85,70)

![A hand activates the software update button in a virtual interface. [ update / patch / fix ]](https://images.idgesg.net/images/article/2020/08/hand_activates_software_update_button_in_virtual_interface_development_update_patch_fix_by_ra2studio_gettyimages-1220938772_2400x1600-100854508-small.3x2.jpg?auto=webp&quality=85,70)