


![Microsoft > Word [Office 365]](https://images.idgesg.net/images/article/2019/02/cw_microsoft_office_365_word-100787162-large.jpg?auto=webp&quality=85,70)
Microsoft’s Word mobile app passed a milestone over the summer: the Android version has been downloaded more than one billion times, according to the Google Play Store. Apple doesn’t provide download figures on its App Store, but with more than 608,000 ratings, the iOS version of Word is clearly popular as well.
On either platform, the app lets you create and edit Word documents on your phone or tablet for free. Typing on a phone isn’t the most comfortable way to compose a long document, but the mobile app can be very handy for starting new docs or making quick edits to existing ones while you’re on the go.
The app has two requirements: First, you need to sign in with a Microsoft user account, which can be a free account (such as one for Outlook.com) or an Office 365 account, which you or your company pays a subscription fee for. Second, the app installs only on phones or tablets with screens that measure less than 10.1" diagonally.
This guide walks you through the major functions of the Word app and shows you how to share your Word document with other people to collaborate on. We’ve focused on the Android phone interface here; if you have a very large phone or tablet your screen might look a little different but should work similarly. The iOS app also has similar features and functions; we’ll note where the steps for using it differ.
Editor’s note: At its 2019 Ignite conference in November, Microsoft announced a new Office mobile app that combines the functionality of its separate Word, Excel, and PowerPoint apps. The all-in-one app has been unstable in our tests so far; until it’s out of beta, we recommend sticking with the current apps.
How to open or create a document
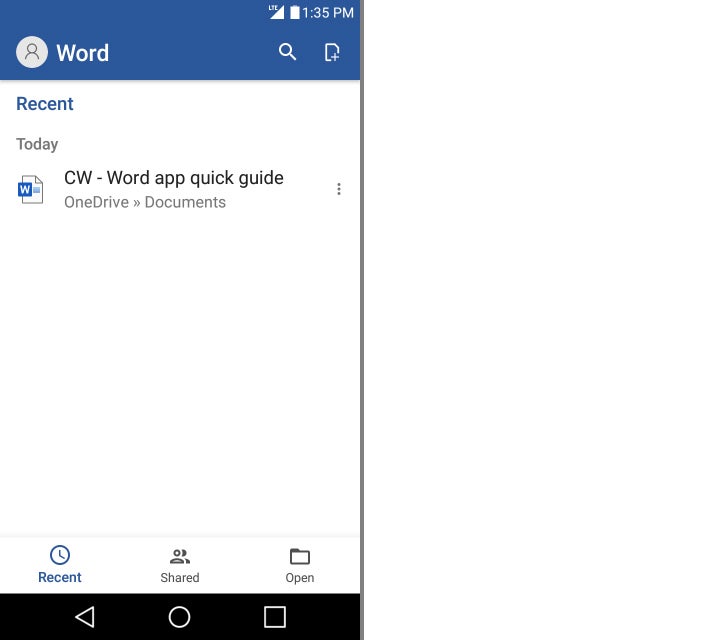
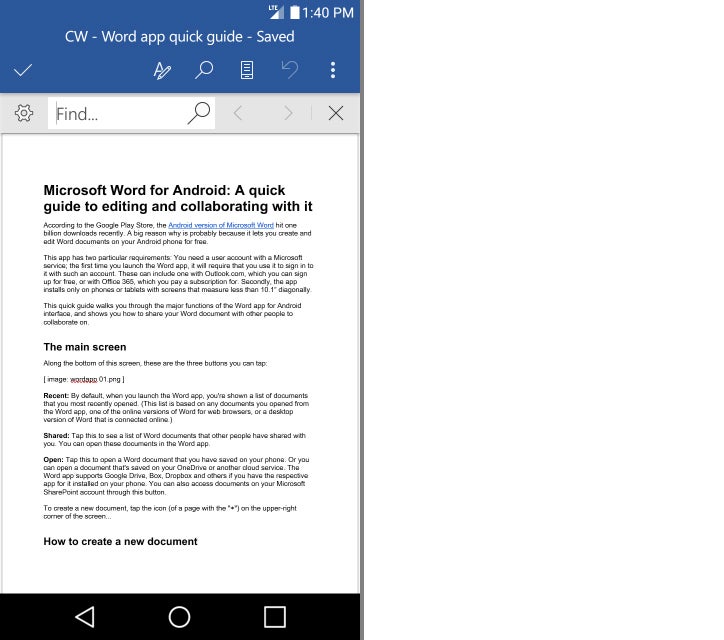
When you launch the Word app, you see a screen that lets you access documents you’ve already created or start a new one. Along the bottom of the screen are three buttons for accessing existing documents:
 IDG
IDG
Viewing recently opened documents in the Word for Android app.
Recent: Tap this to see a list of the documents that you’ve most recently opened in the Word mobile app, Word Online, or a desktop version of Word that is connected online.
Shared: Tap this to see a list of Word documents that other people have shared with you. You can open these documents in the Word app.
Open: Tap this to open a Word document that you have saved on your phone, in OneDrive, in SharePoint, or in another cloud storage service. The Word app supports Google Drive, Box, Dropbox and others if you have the respective app for it installed on your phone.
Whichever screen you use to access documents, just click any document in the list to open it in the app.
To create a new document in the Android app, tap the New icon (a page with a "+" symbol) on the upper-right corner of the screen. In iOS, the New button is at the far left of the row of buttons running along bottom of the home screen.
You’re taken to a screen where you can start a new blank document or pick a template for a type of document, such as a to-do list, outline, resume, business paper or business letter.
 IDG
IDG
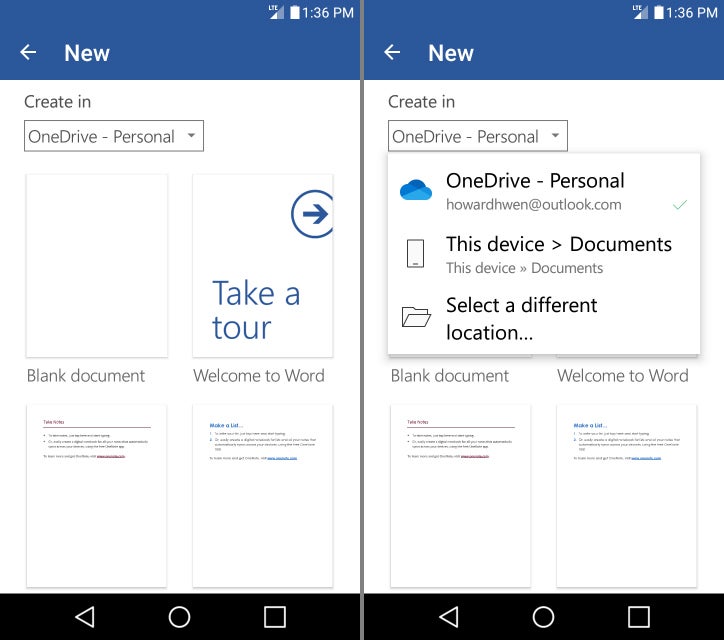
In the Android app, you choose where to store a new document as you create it.
Here the steps diverge slightly depending on whether you’re using the Android or iOS app. At the top of the New screen in Android, “Create in” indicates where your new document will be saved: OneDrive, another cloud storage service, or your smartphone. Tap the drop-down to open a menu to pick where you want your document to be saved, then select the type of document you want to create.
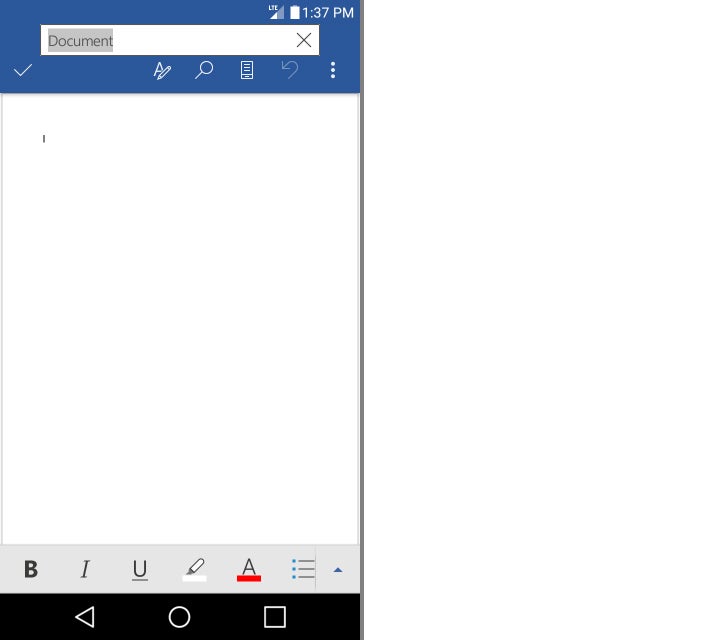
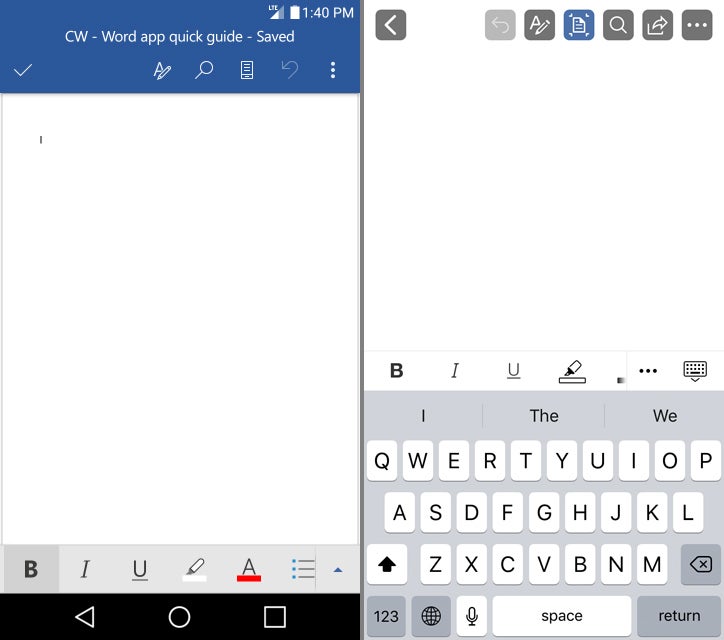
When you open a document or create a new one on an Android phone, it's presented in Edit mode with toolbars along the top and bottom of the screen. (More on that in a moment.) The document’s name appears at the top of the editing screen. To change it, tap the current name, then enter a new name for it.
 IDG
IDG
Tap the document's title to name (or rename) it.
The AutoSave feature, which automatically saves the document as you work in it, is enabled by default for all documents in the Android app. You can turn it off under Settings, but we recommend leaving it on.
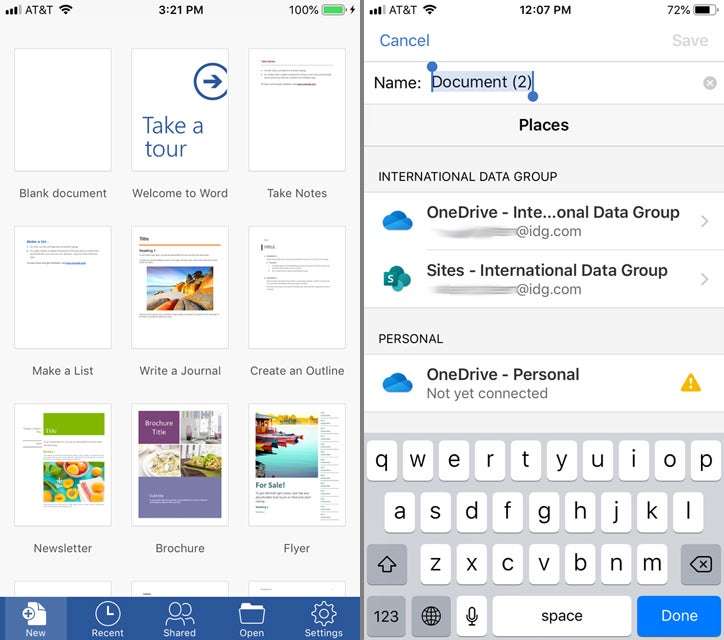
To create a new document in iOS, you first select the type of document you want to create on the New screen. Then, when document opens in the editing screen, you choose where to save it by tapping the three-dot button in the upper-right corner of the screen, tapping the Save button on the next screen, and choosing a document name and save location. This turns on AutoSave for the document. You can toggle it off on the save screen if you like, but we recommend leaving it on.
 IDG
IDG
Starting a new document (left) and naming and choosing where to save it (right) in the iOS app.
To save a document under a different name in the iOS app, tap the same three-dot button in the upper-right corner of the editing screen and select Save a Copy.
How to compose or edit a document
Although the interfaces have a somewhat different look and feel, composing and editing Word documents is similar in the Android and iOS apps.
 IDG
IDG
The basic editing screen in Word for Android (left) and iOS (right).
As mentioned previously, when you open or create a document on an Android phone, it opens in a screen with toolbars running along the top and bottom. The top toolbar contains general commands for working with the document, while the bottom one has controls for formatting text. At first there’s no onscreen keyboard, but if you tap in the body of the document, a keyboard appears below the bottom toolbar.
On an iPhone, only the top toolbar shows when you open a document. Tap anywhere in the body area to make both the formatting toolbar and the keyboard slide up from the bottom of the screen.
On devices with larger screens, the interface looks more like the Word desktop app, with a simplified Ribbon interface above the document body. The tabs in the Ribbon (Home, Insert, Draw, Layout, Review, and View) are the same as the options found in the expanded bottom toolbar in the phone apps (see below), but with more screen space available, they can be visible all the time.
 IDG
IDG
If you have a very large phone or tablet, you might see the Ribbon interface at the top of the screen instead of the top-and-bottom toolbar setup found on smaller phones.
Using the top toolbar
In the top toolbar in both Android and iOS, you’ll find these buttons:
Show Commands: This icon looks like the letter A with a pencil over it. Tapping it expands the bottom toolbar up to reveal more buttons for formatting text and paragraphs.
Find: Tap the magnifying glass icon to open a search toolbar, which you can use to search for text in your document. Tapping the gear icon to the left of the search box opens a menu with search options such as “Find and Replace” or “Match Case.”
 IDG
IDG
It's easy to search for a word or phrase in your document.
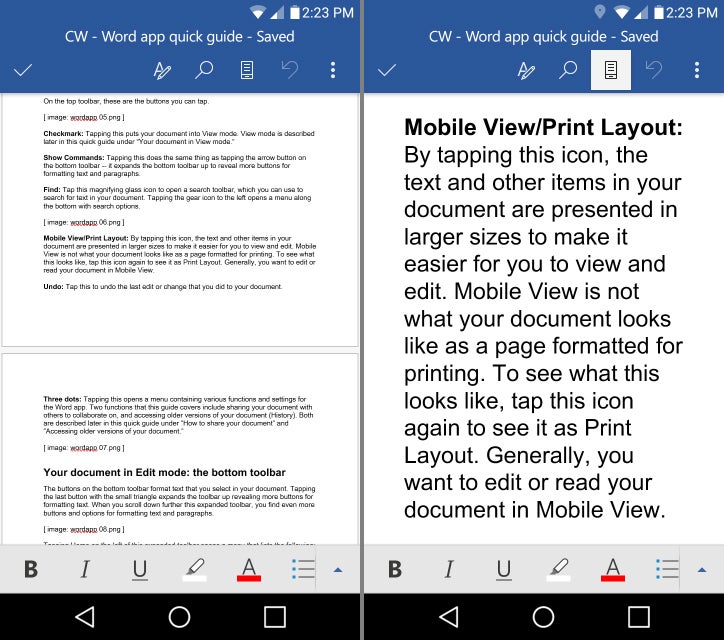
Mobile View/Print Layout: This icon, located to the right of the Find icon in Android and to the left of it in iOS, toggles between Mobile View and Print Layout. In Mobile View, the text and other items in your document are presented in larger sizes to make it easier for you to view and edit. Print Layout is what your document looks like as a page formatted for printing. Generally, you want to edit or read your document in Mobile View when you’re using the mobile app.
 IDG
IDG
Print Layout (left) shows you what your document will look like printed; Mobile View (right) makes it easier to read as you're editing the document on your phone.
Undo: Tap this to undo the last edit or change that you did to your document.
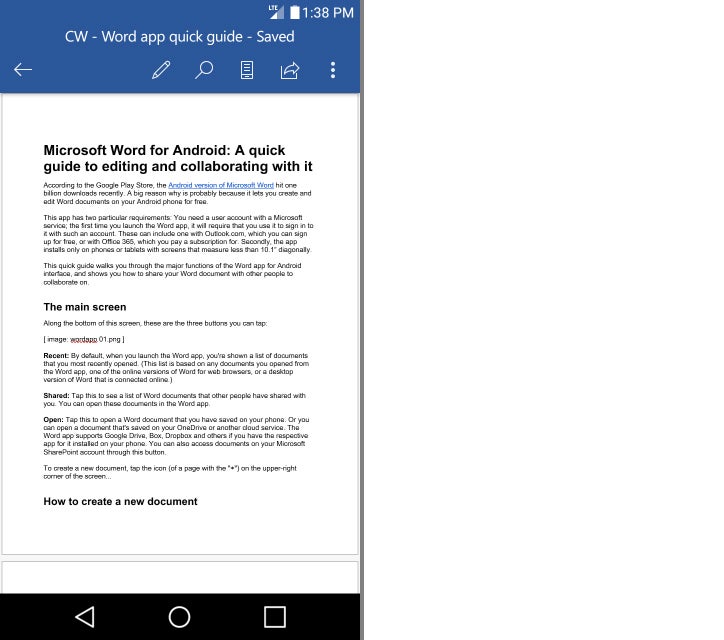
The Android app also has a Checkmark icon at the left end of the top toolbar. Tapping this puts your document into View mode, meant for when you want to simply read the document without editing it. The bottom toolbar (and keyboard, if it’s present) goes away, and there are two new icons on the top toolbar: a Pencil icon that takes your document back to Edit mode, and a Share icon for sharing your document with others to collaborate on. (Sharing is described later in this story.)
 IDG
IDG
View mode removes the bottom toolbar for a cleaner view when you want to read but not edit a document.
In iOS, the Share icon is in the top toolbar from the get-go. To invoke View mode, simply tap the keyboard icon at the right end of the bottom toolbar; when you do, the bottom toolbar and keyboard slide out of sight.
Finally, both versions have a three-dot icon at the far right of the top toolbar. Tapping it opens a menu containing various functions and settings for the document, including printing it, exporting it to another format, sharing it with others to collaborate on, and accessing older versions of it. We’ll cover those last two features later in this guide.
Using the bottom toolbar
The buttons in the bottom toolbar format text that you select in your document. Only a few commands appear by default, but you can scroll through the toolbar horizontally to see several more commands.
Tapping the last button (in Android it has a small triangle; in iOS it’s another three-dot button) expands the toolbar, revealing more buttons for formatting text. (When the bottom toolbar expands, the top one disappears to make more room onscreen.) You can scroll down through the expanded toolbar to find even more options for formatting text and paragraphs.
 IDG
IDG
Scroll through the expanded toolbar to find more text formatting commands, or tap Home and choose another menu option to see commands in other categories.
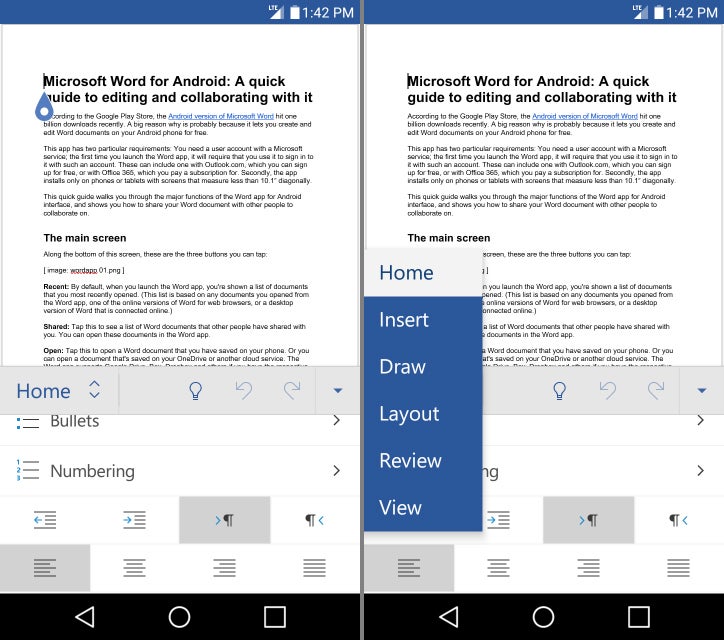
Tapping the Home button on the left side of the expanded toolbar opens a menu that includes several options roughly corresponding to the Ribbon tabs in the Word desktop app:
Home: This menu item contains the most commonly used text and paragraph formatting commands, including text size and font; bold and italic; bulleted and numbered lists; and so on.
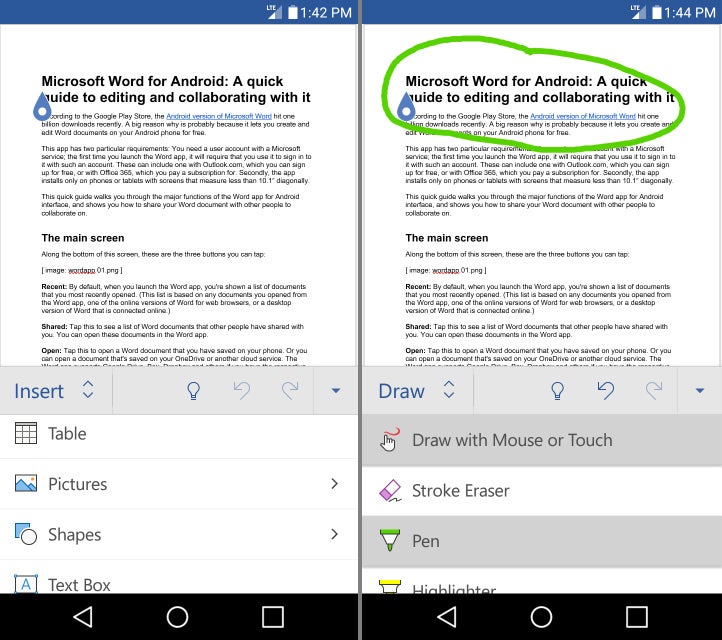
Insert: Tap this to insert a picture, table, shape or text element (such as endnotes, footers, footnotes, headers, and page numbers). You can also add blank pages, comments or web links.
Draw: This brings up a simple drawing tool that lets you use your phone's touchscreen to sketch on your document.
 IDG
IDG
The Insert menu (left) lets you insert pictures, tables, footnotes and more, while the Draw menu (right) gives you tools for drawing or writing on the document.
Layout: Here you adjust the margins, orientation (landscape or portrait), and paper size of your document.
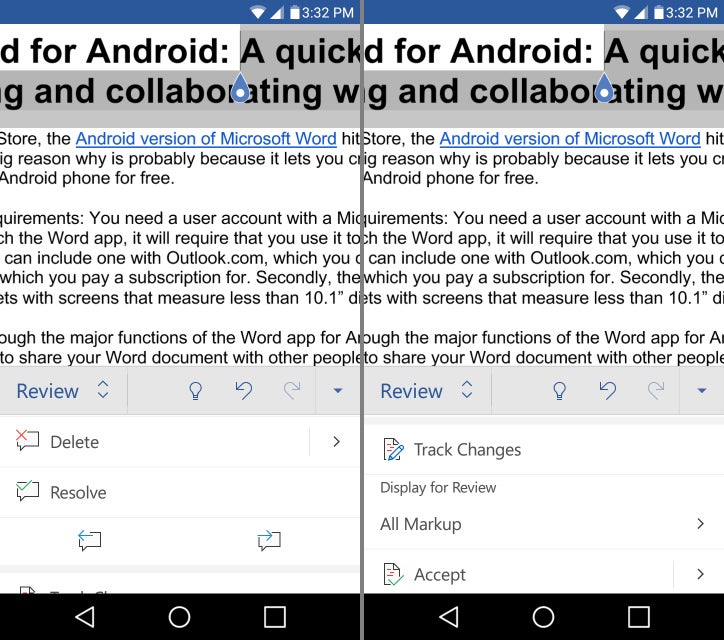
Review: The panel that opens when you tap this is particularly useful for a document that you are collaborating with other people on. You can scroll through the Review panel to go over and respond to comments made by collaborators. Spell-check and word-count tools are here, too.
 IDG
IDG
Use the Review menu for reviewing collaborators' comments, using spell-check, and more.
This panel also lets you review and accept (or reject) edits and other changes that have been made to your document by collaborators. However, if you’re not already an Office 365 subscriber you have to pay to activate this function by subscribing to an Office 365 plan, which starts at $7 per month.
View: This option gives you different ways to view your document, such as in the aforementioned Mobile View or Print Layout; or formatted at 100% or to the width of your phone’s screen. You can also set the app to view more than one page of your document at once on your phone screen.
To shrink the expanded toolbar back down (and have the top toolbar reappear), click the button with the downward-facing triangle to the right.