Step 3: In-place upgrade to current Windows 10 version
This technique essentially involves overwriting the current OS installation with a fresh new copy while leaving your data files, settings, and preferences alone. It means running the Windows 10 installer for the same version/build that is currently running on the machine from inside Windows 10 itself.
To accomplish this, you’ll need installation media for the same edition (Home, Pro, Enterprise, or Education), language (en-US for American English, for example), and build as the currently installed edition. Bittedness must also be identical: 32-bit media for a 32-bit install, 64-bit media for a 64-bit install. (See “The best places to find Windows 10 ISOs” for info on obtaining the correct Windows 10 version/build from HeiDoc.net, UUP Dump, or the Media Creation tool, and use the Windows Insider Preview Downloads page for Windows 11 builds.) I recommend building an installable and bootable USB flash drive for this purpose; you may need it again sometime. (There’s a great TenForums tutorial on how to do this.)
Before launching into this process, make sure to log in to Windows 10 with an administrative account. Most experts recommend that you disable or uninstall any third-party antivirus or security software (anything other than Windows Defender, in other words) and turn off Fast Boot and Secure Boot in your UEFI firmware settings (if turned on). You can reinstate these items when the install is complete.
Performing an in-place upgrade is easy. Run setup.exe from the USB flash drive, or from the mounted ISO, which should reside on some drive other than the system/boot device. The Windows installer will do the rest and will guide you through the installation process. On the “Ready to install” screen, be sure both “Install Windows 10” and “Keep personal files and apps” are checked. The second checkmark is particularly important because that tells you it’s indeed an upgrade install, which leaves non-OS files and settings (mostly) alone.
The whole process takes 10 to 30 minutes, depending on your PC’s hardware. You’ll need to reestablish your network connection and set your time zone (unless you live in the Pacific time zone where Microsoft has its HQ). For more detailed instructions, including a list of cleanup tasks to perform after the in-place install, see my article “How to fix Windows 10 with an in-place upgrade install.”
Step 4: Completely reinstall Windows 10
If none of the previous steps has fixed Windows, it’s time for a do-over. In this step, you can choose one of two different options for completely reinstalling Windows on your machine — a more draconian approach to restoring operations than any of the previous steps. Whichever method you choose, you’re going to have to reinstall all apps and applications.
Option A: Reset this PC
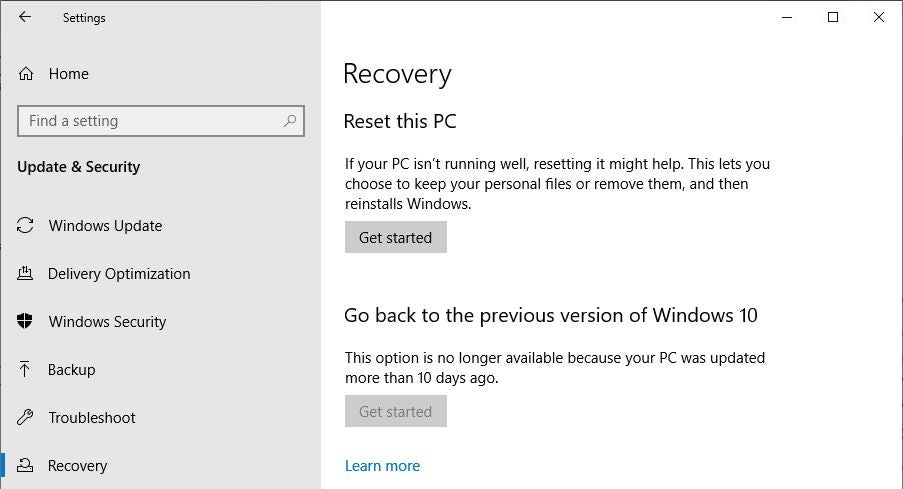
This repair method rolls your PC back to its built-in recovery image (usually established when the unit gets its initial Windows image and the original system/boot disk layout is established) or a fresh, clean Windows image downloaded from Microsoft’s servers. For something with the ability to change your PC so thoroughly and completely, it’s surprisingly easy to do from an administrative account. Go to Settings > Update & Security > Recovery, and then click the Get started button under “Reset this PC.”
 IDG
IDG
Figure 8: Don’t click the Get started button unless you’re ready, willing, and able to rebuild the PC from the ground up. (Click image to enlarge it.)
The next screen to appear lets you know exactly what you’re in for, and why a reset is properly described as “major” or “draconian” in scope, impact, and effort involved.
 IDG
IDG
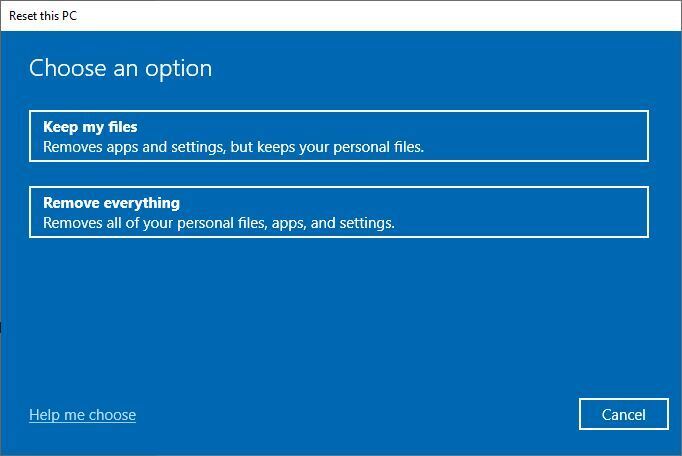
Figure 9: This is your last chance to bail out on a long process. If you decide to proceed, you can keep personal files, or get rid of everything. (Click image to enlarge it.)
Understand what this means: if you reset, you lose all applications and apps installed after the OS made its initial appearance. You can decide whether or not to keep what Microsoft calls your “personal files” (everything in Documents, Downloads, Pictures, Music, and Videos), but everything else will go.
If you proceed with the reset, you’re presented with two options: “Cloud download” grabs fresh, new Windows installation files from Microsoft’s servers, while “Local reinstall” uses your PC’s built-in recovery image. Unless you have connectivity restraints, I recommend the cloud download option to ensure that any issues with your PC’s recovery image won’t carry through to the new installation.
For more details about using Restore this PC, see my article “Windows 10 recovery, revisited: The new way to perform a clean install.”
Reset this PC is convenient and requires no supplementary media, but I prefer the traditional approach of performing a clean Windows 10 installation from a bootable USB drive or mounted ISO, covered next.
Option B: Clean install of Windows 10 from installation media or mounted ISO
This option means starting over with a completely new OS installation. Why might this be necessary? Aside from reasons such as incurable system instability, malware infestation, or problems that take longer to fix than the time is worth, it may be desirable to switch from legacy BIOS emulation to using available UEFI. It might also be desirable to wipe the boot/system drive clean to remove leftover items (recovery partitions, OEM partitions, and so forth) from older Windows versions and let Windows 10 start over with a clean slate.
The good news is that as long as you’ve got a valid Windows 10 key or you’ve upgraded from Windows 7 or 8.1, Microsoft will recognize your PC and permit it to activate itself without requiring you to supply that key again. Nevertheless, if you’ve got access to the key, it’s a good idea to put that file on a USB drive or some other storage media just in case it’s requested. This seldom happens, but should it be needed, it’s good to have. (There’s a great tutorial at TenForums about how to find and record your Windows 10 key and digital entitlements.)
The process for performing a clean install is 99% the same as that for the in-place upgrade from step 3. Just boot from your installation USB flash drive, select Install Now, accept the license terms, and pick the Custom: Install Windows only (advanced) option when it’s presented to you. The rest of the details — and there are many — are all nicely covered in the TenForums tutorial on this subject.
After the installation
Once you complete either the Reset this PC or the “clean install from installation media or mounted ISO” process, you’ll be starting over from scratch. For me, that means reinstalling Office plus all the apps and utilities that I customarily use on a production machine. It usually takes me 8 to 12 hours to work all the way through this process when manually setting up a new production PC, so that’s the worst-case scenario.
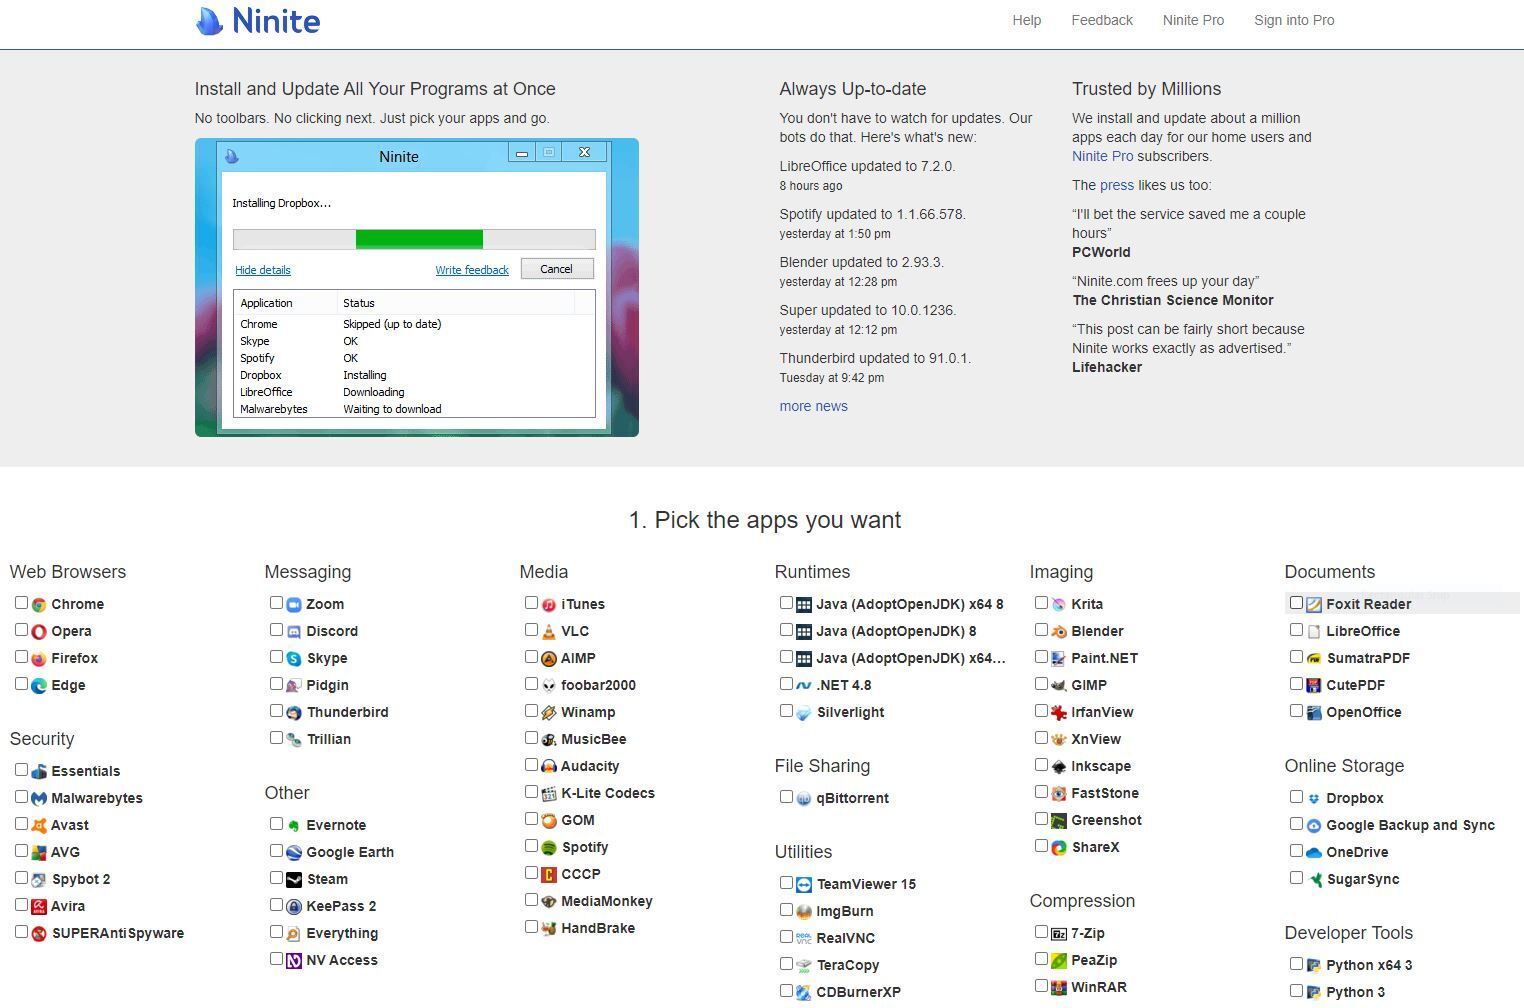
Be sure to check out the great Ninite utility, which lets you create a custom menu of common applications and tools that it will then automatically install on your behalf. Ninite covers about half of what I normally outfit my production PCs with, so I still have to download another dozen programs or so to finish up after that. The Ninite selection screen appears in Figure 10.
 IDG
IDG
Figure 10: At last count, Ninite provides auto-install for 90+ commonly-used programs. (Click image to enlarge it.)
Picking up the pieces after the repair
Hopefully, you’ll never have to venture further than Step 2 in this list. But if you must dig deeper than that, remember to clean up after it’s all over. That means running Disk Cleanup (or some third-party alternative) and making sure all your applications are installed and working. It also means making another backup when you’ve got things the way you want them, so you’ll have it at your disposal should things go south again.
In the meantime, enjoy your repaired and rejuvenated Windows 10 system!
The Windows 11 situation
Pretty much everything I’ve reported here about Windows 10 also applies to Windows 11, which I’ve been testing as part of the Insider Preview program. If you have a Windows Insider account, you can use an ISO from the Windows Insider Preview Downloads page, and you should be able to perform DISM repairs or an in-place upgrade repair install.
In most ways, and all the important ones, repairing Windows 11 is the same as repairing Windows 10. Good luck, and have fun!
This article was originally published in June 2016 and updated in November 2021.


![laptop keyboard with a life preserver or personal floatation device [PFD]](https://images.idgesg.net/images/article/2018/02/rescue_diagnose_fix_patch_update_laptop_thinkstock_185931513-100749650-small.3x2.jpg?auto=webp&quality=85,70)

![A hand activates the software update button in a virtual interface. [ update / patch / fix ]](https://images.idgesg.net/images/article/2020/08/hand_activates_software_update_button_in_virtual_interface_development_update_patch_fix_by_ra2studio_gettyimages-1220938772_2400x1600-100854508-small.3x2.jpg?auto=webp&quality=85,70)