


Use Smart Lookup for quick online research
Another new feature, Smart Lookup, helps you do research while you’re working on a document. Right-click a word, or highlight a group of words and right-click them, and from the menu that appears, select Smart Lookup. Word then uses Microsoft’s Bing search engine to do a search on the word or phrase and displays the results in the a pane that appears on the right side of the screen. (In Word 2016 this is called the Insights pane, while in Word 2019 it’s the Smart Lookup pane, but they work the same way.) Microsoft says that Smart Lookup uses the context around the words, not only the words themselves, to give you more relevant results.
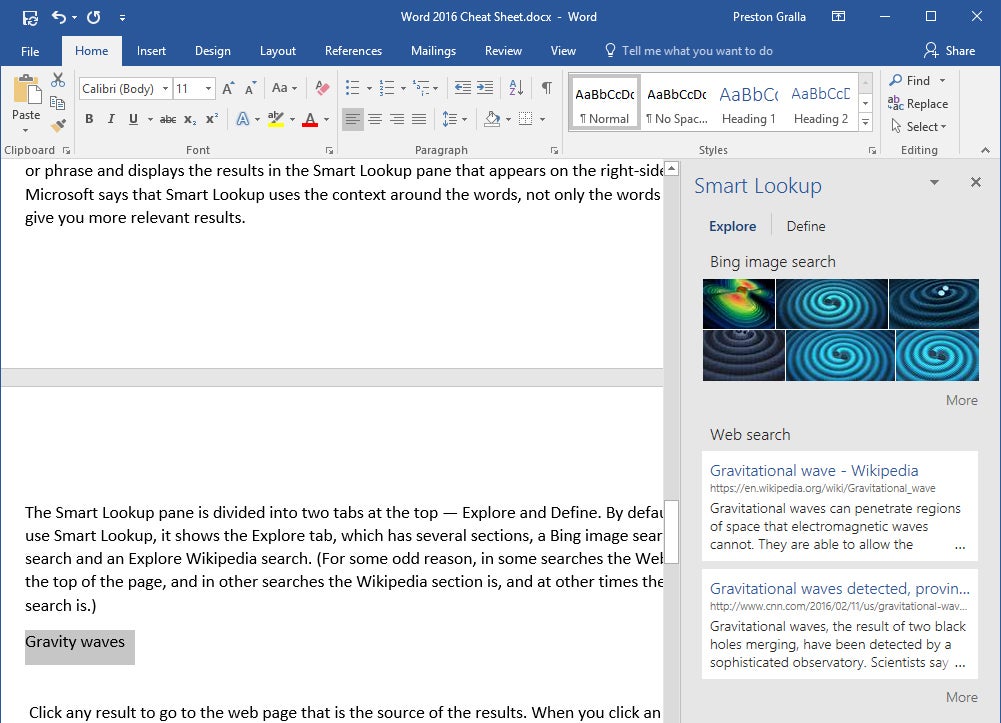
The pane is divided into two tabs at the top — Explore and Define. By default, when you use Smart Lookup, it shows the Explore tab, which includes a Bing image search, a web search and an Explore Wikipedia search. (For some odd reason, in some searches the web search is at the top of the page, in other searches the Wikipedia section is, and at other times the Bing image search is.)
 IDG
IDG
The results of a Smart Lookup for gravity waves. (Click image to enlarge it.)
Click any result to go to the web page that is the source of the results. When you click an image in Bing image search, you’re not sent to the individual image, but instead to a page full of the results of the Bing image search. However, the image that you click will be the first image on the page.
In the web search, the first result is often a Wikipedia entry, followed by a variety of other results. For example, when I did a search on “coal mining,” the Wikipedia entry was first, followed by information from the World Coal Association. Similarly, when I searched for “gravity waves,” the first two results were from Wikipedia, one for “Gravitational wave” and other for “gravity waves.” In instances like this in which there’s more than one Wikipedia entry, Wikipedia gets its own section in the Smart Lookup pane, followed by web search. Each of the sections in the Explore tab has a More link underneath the results. Click it to see additional results.
If you’re not pleased with the results of a search, I suggest doing the search again, because you might get different results. I did the coal mining search twice; once it returned one result from Wikipedia, and another time it turned multiple results (one for coal mining and another for “History of coal mining.”).
As for the Define tab, the result is simple and straightforward: a definition of the word or term from the Oxford Dictionaries from Oxford University Press. Don’t bother clicking the definition; it doesn’t link out to the web.
Note that in order to use Smart Lookup in Word or any other Office app, you might first need to enable Microsoft’s intelligent services feature, which collects your search terms and some content from your documents. (If you’re concerned about privacy, you’ll need to weigh whether the privacy hit is worth the convenience of doing research from right within the app.) If you haven’t enabled it, you’ll see a screen when you click Smart Lookup asking you to turn it on. Once you do so, it will be turned on across all your Office applications.
Add new types of charts
Office 2016 debuted six new types of charts you can add to documents, spreadsheets, and presentations: Treemap, Sunburst, Waterfall, Histogram, Pareto, and Box & Whisker. And Office 2019 added two more: Funnel and Map charts. Each provides a unique way to display data visually. See our Excel 2016 and 2019 cheat sheet for details about the new chart types, including what each one looks like and what type of data it’s best suited for.
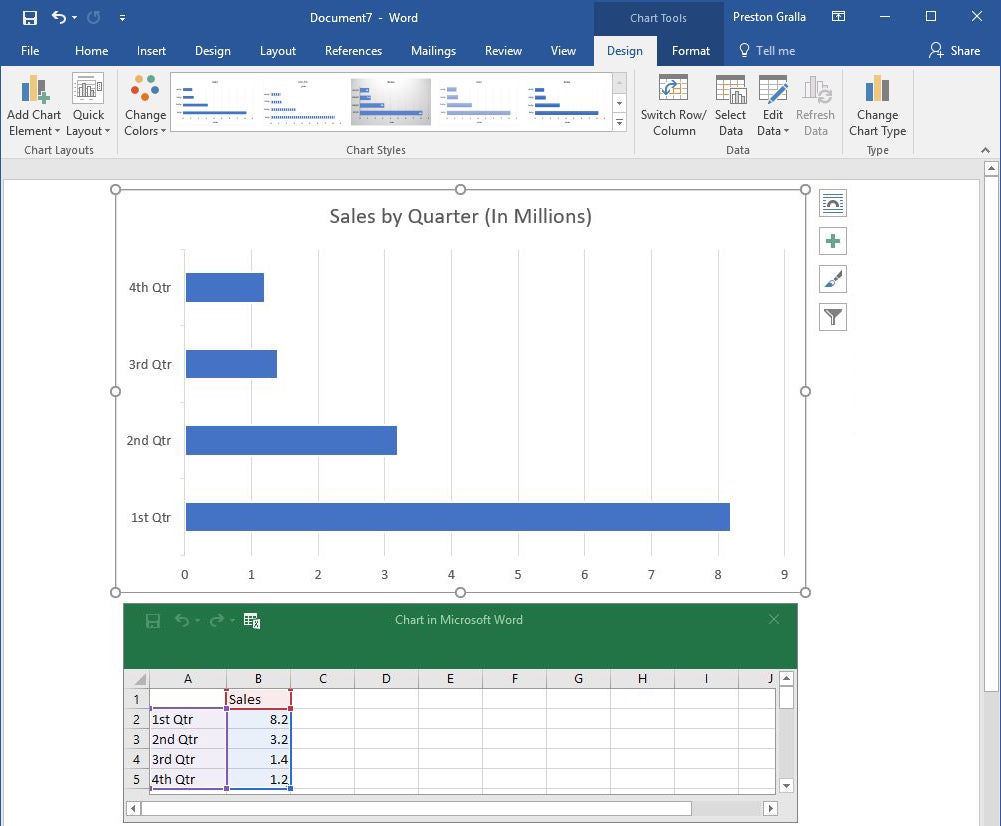
To insert any of the new chart types (or any other chart) in a document, select Insert > Chart and then choose the type of chart to insert. When you do that, the chart appears in your document with placeholder data, and a pop-up window appears that looks like a mini Excel spreadsheet. Enter or edit the data, or else click the Edit in Excel button to open it up in Excel and edit it there.
 IDG
IDG
When you insert a chart, a window where you can edit the data pops up. (Click image to enlarge it.)
Note that the Pareto chart does not show up in the charts list when you select Insert > Chart. To insert one, select Insert > Chart, select Histogram, and at the top of the screen that appears, select the option to the right, Pareto.
Use the new Translator pane in Word 2019
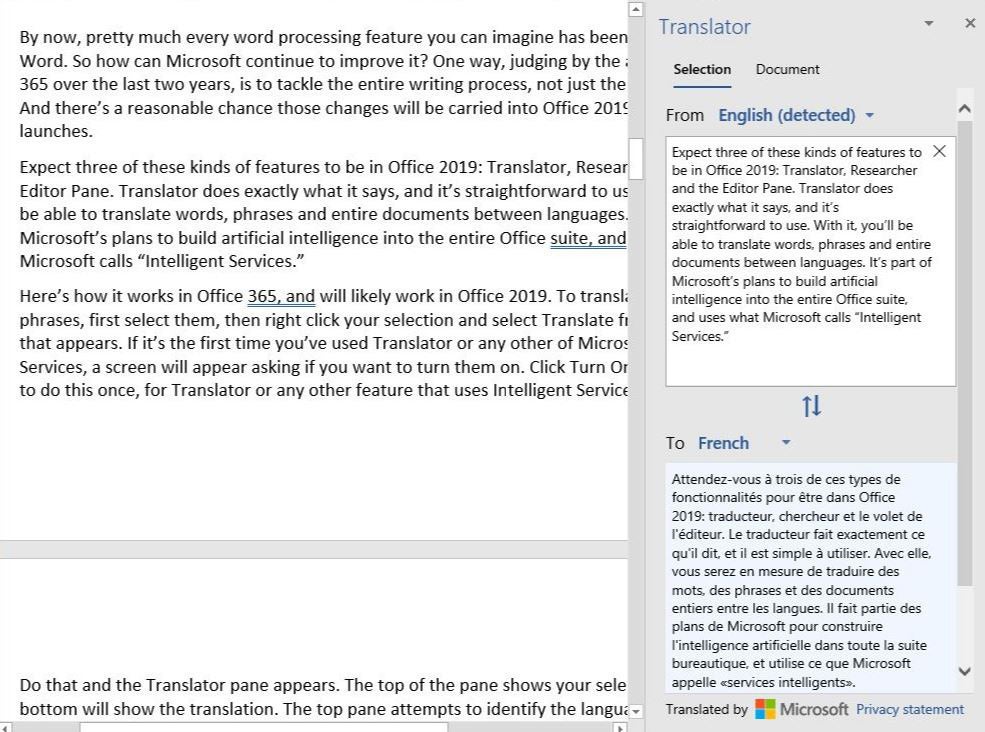
In addition to two additional chart types and true real-time collaboration, Microsoft rolled out a spiffed-up version of its translation tool. Called the Translator pane, it’s useful for those who need to work in multiple languages. To translate words or phrases, select them, right-click your selection and choose Translate from the menu that appears.
The Translator pane appears. The top of the pane shows your selection, and the bottom shows the translation. The top pane attempts to identify the original language, which it does with uncanny accuracy. If it misidentifies the language, though, simply select the right one. After that, in the bottom of the pane select the language you want to translate to.
The translation appears. To insert it somewhere into the document, move your cursor to the spot where you want it to appear, and click the Insert button at the bottom of the pane. You can also copy and paste any part of the translation into the document or another document.
 IDG
IDG
Word 2019’s Translator feature in action. (Click image to enlarge it.)
Translator can also translate an entire document. To do it, go to the Review tab on the Ribbon, and in the Language section, click Translate > Translate Document. The Translator pane appears. You can let it auto-detect the original language or click the From drop-down to set it. Then click the To drop-down to set the language you want to translate the document to and click the Translate button. Word opens the translated document in a new window.
Keep in mind that Translator is part of Microsoft’s Intelligent Services, the artificial intelligence behind other Office features including Lookup and Researcher. If it’s the first time you’ve used one of these AI-driven features, a screen appears asking if you want to turn Intelligent Services on. Click Turn On. You’ll only have to do that once.
Handy keyboard shortcuts
Using keyboard shortcuts is one of the best ways to accomplish tasks quickly in Word 2016 and 2019. You can even use them to navigate the Ribbon. For instance, Alt-H takes you to the Home tab, and Alt-G takes you to the Design tab. (For help finding specific commands on the Ribbon, see our Word 2016 and 2019 Ribbon quick reference.)
 IDG
IDG
Using the Alt key helps you master the Ribbon shortcuts. (Click image to enlarge it.)
But there are many other keyboard shortcuts to help you accomplish a vast array of tasks in Word 2016 and 2019. We've listed the ones we've found the most useful below. For even more shortcuts, see Microsoft's Office site.
Useful Word 2016 and 2019 keyboard shortcuts
Don't forget to download our Word 2016 and 2019 Ribbon quick reference!
This story was originally published in April 2018 and updated for Word 2019 in August 2019.
![Computerworld Cheat Sheet > Microsoft > Word [2016 / 2019]](https://images.idgesg.net/images/article/2020/06/cw_microsoft_2016_2019_word_cheat_sheet_2400x1600-100849337-small.3x2.jpg?auto=webp&quality=85,70)
![Computerworld Cheat Sheet > Microsoft > Excel [2016 / 2019]](https://images.idgesg.net/images/article/2020/06/cw_microsoft_2016_2019_excel_cheat_sheet_2400x1600-100849339-small.3x2.jpg?auto=webp&quality=85,70)
![Computerworld Cheat Sheet > Microsoft > PowerPoint [2016 / 2019]](https://images.idgesg.net/images/article/2019/02/cw_microsoft_2016_2019_powerpoint_cheat_sheet-100787134-small.3x2.jpg?auto=webp&quality=85,70)
![Computerworld Cheat Sheet > Microsoft > Outlook [2016 / 2019]](https://images.idgesg.net/images/article/2020/06/cw_microsoft_2016_2019_outlook_cheat_sheet_2400x1600-100849338-small.3x2.jpg?auto=webp&quality=85,70)